AMLFS in AzHOP
Integrating Azure Managed Lustre File System (AMLFS) with Blob storage into AzHOP provides a seamless environment for handling high-performance computing and large-scale data workflows. This blog post outlines a step-by-step guide to achieve this integration, covering aspects such as creating a DataLake v2 supported storage account, establishing vnet peering between the storage account and AzHOP, and configuring AMLFS with Blob integration. We will also touch upon the Network Security Group (NSG) settings and optional blob configurations. Although the current method relies on Azure Portal, future adaptations will focus on automation through tools like Terraform and Ansible. The guide is complemented with illustrations for each step, ensuring clarity and ease of implementation.
Steps to integrate AMLFS with blob integration to AzHOP
- Create a storage account with DataLake v2 support
- vnet peering between the storage account and azhop
- Create AMLFS with blob integration
- Update azhop network security group (NSG)
- Add AMLFS to cluster init (optional blob storage mount via blobfuse)
Note: This solution is currently portal based. Many of the following steps can be automated in the future using Terraform and Anisble.
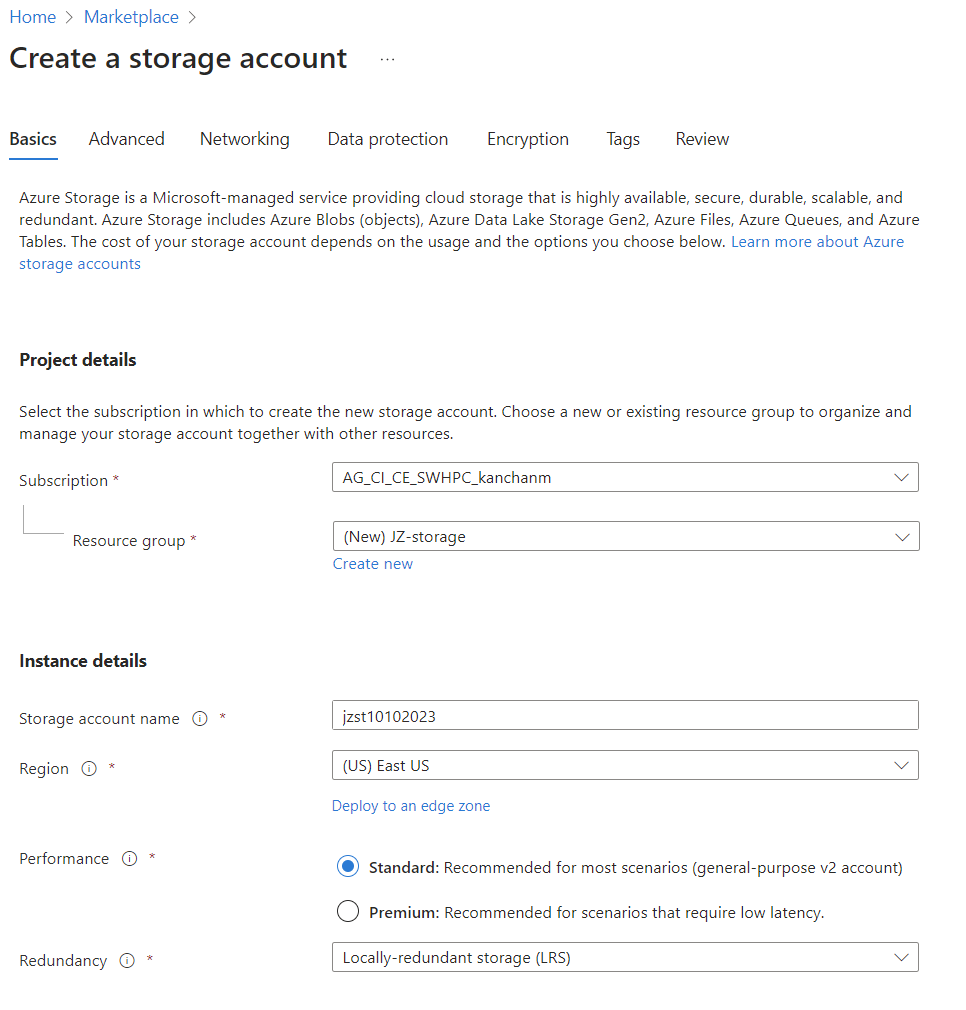
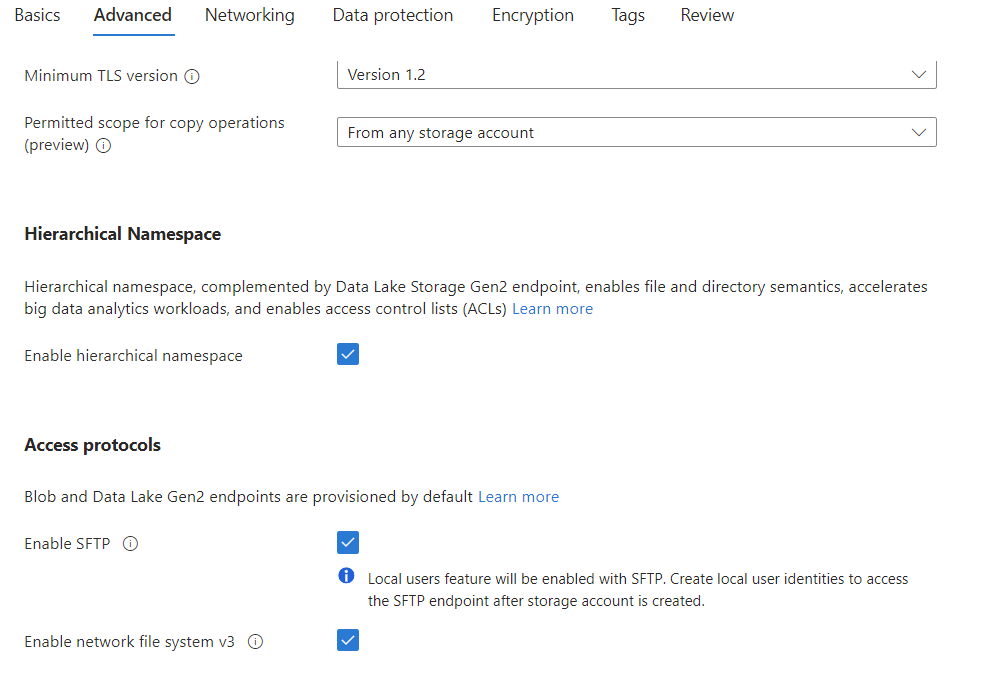
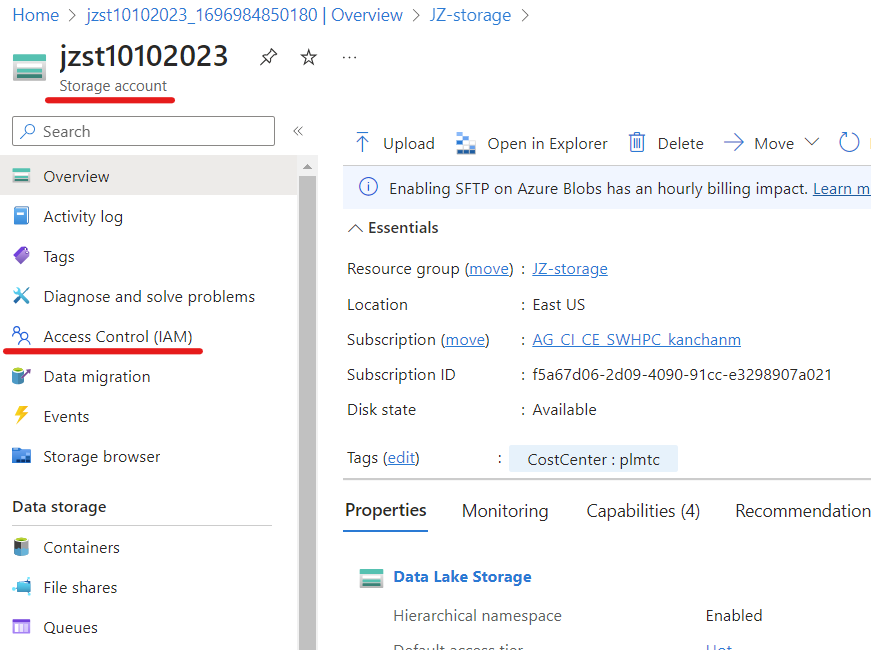
Create a new StorageAccount with DL v2
Create the resource group
In the Basics and Advanced tabs, follow the setting below. Leave the rest values as default.
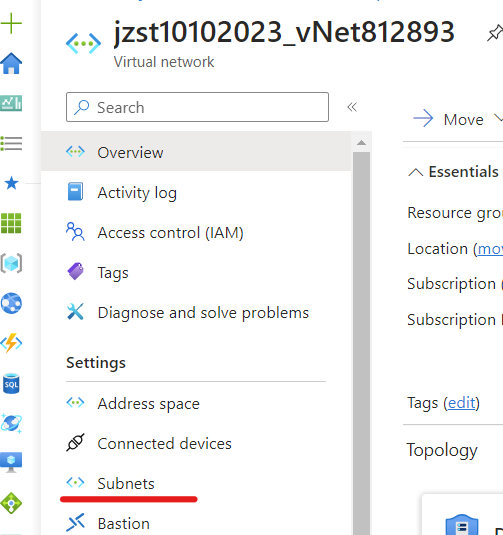
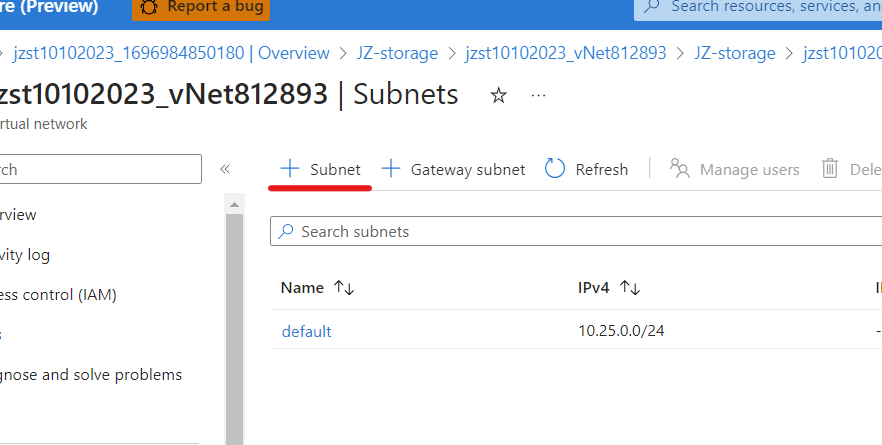
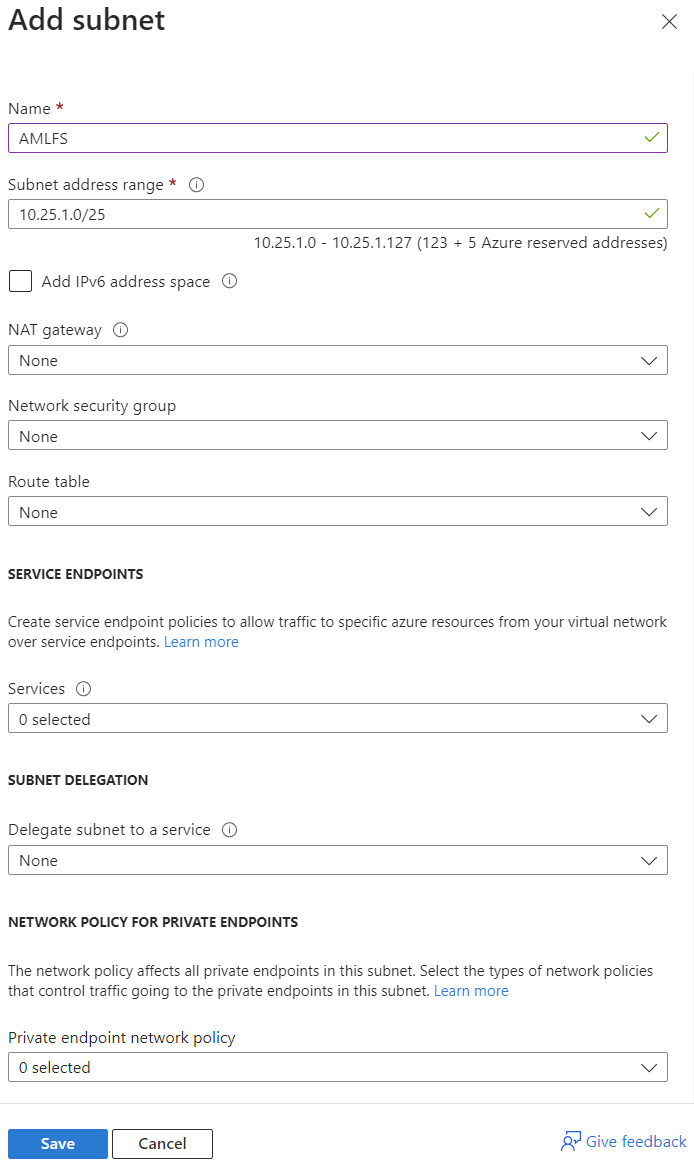
Create a subnet for AMLFS
Select vnet from the resource group. Select Subnets and create a submit following the instructions below:
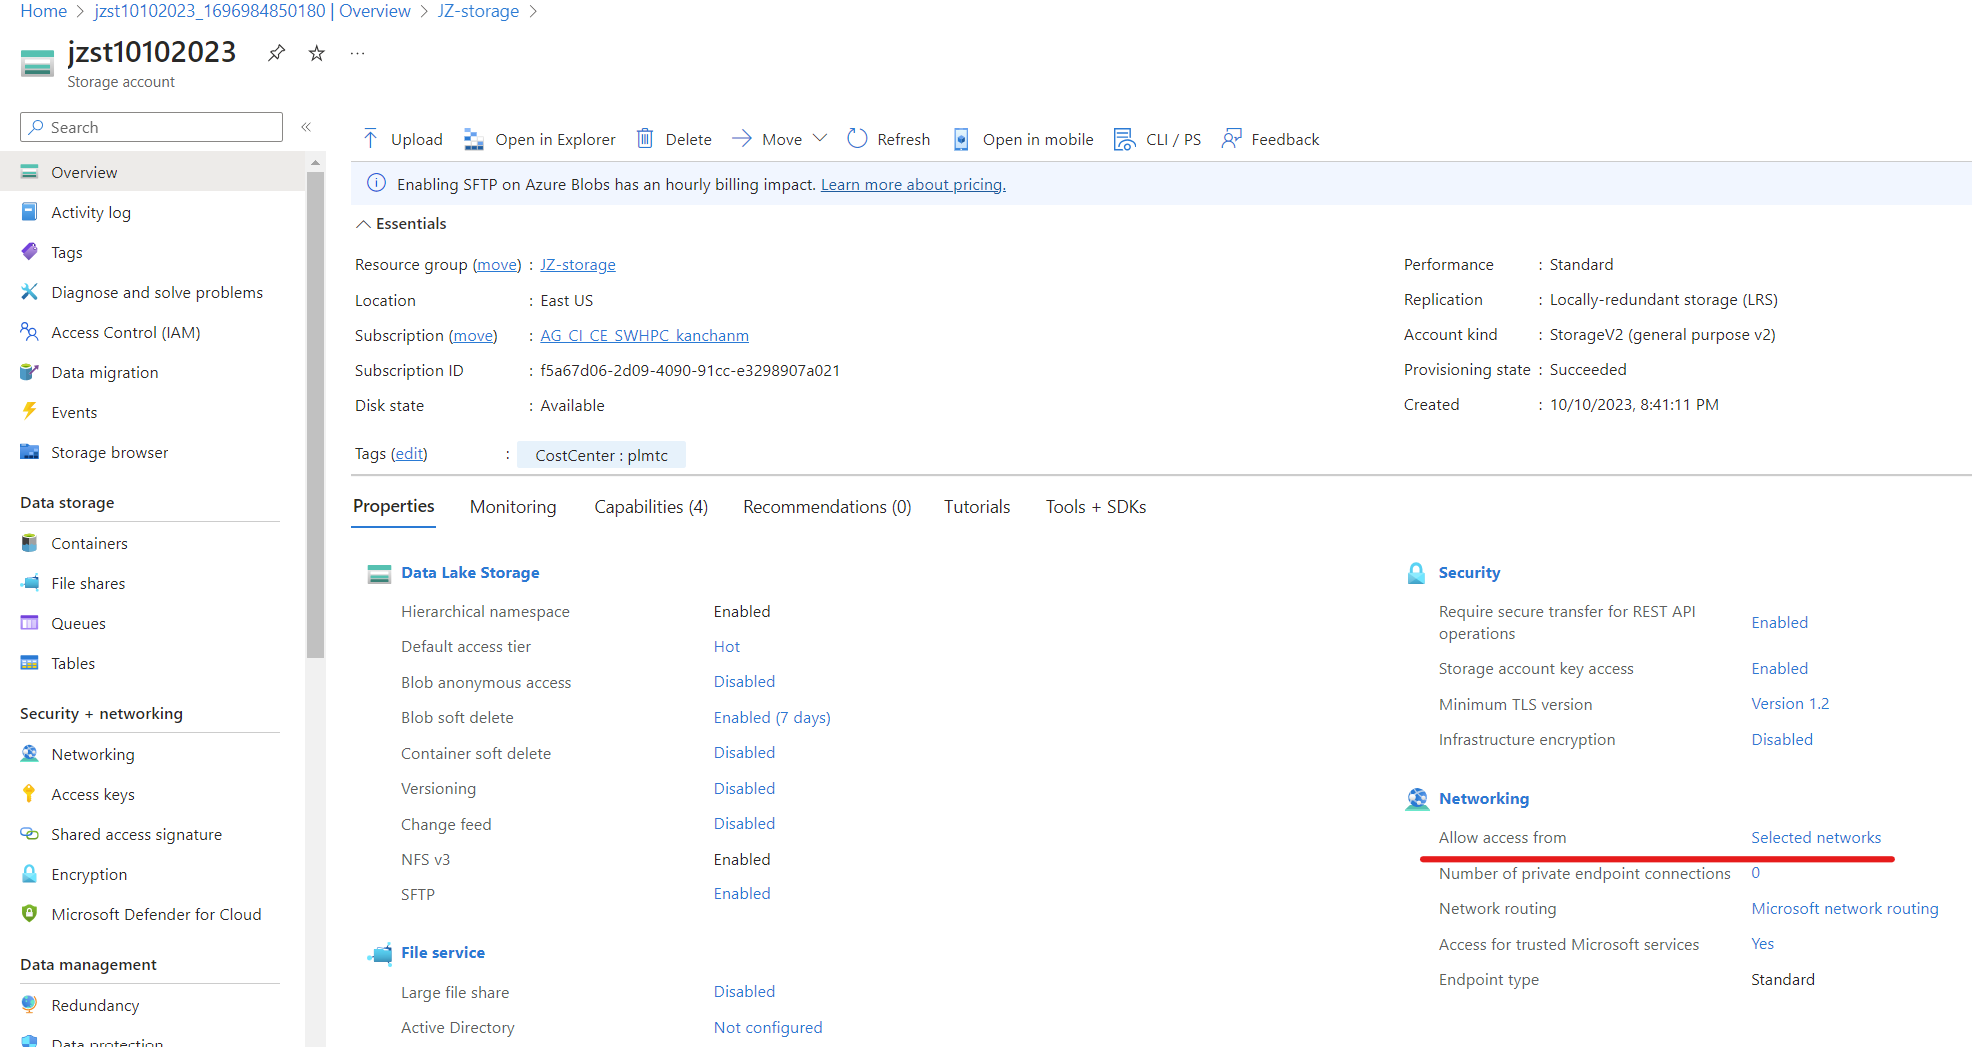
Change storage account networking
Change storage account networking from Allow access from: Selected networks to Allow access from: All networks.
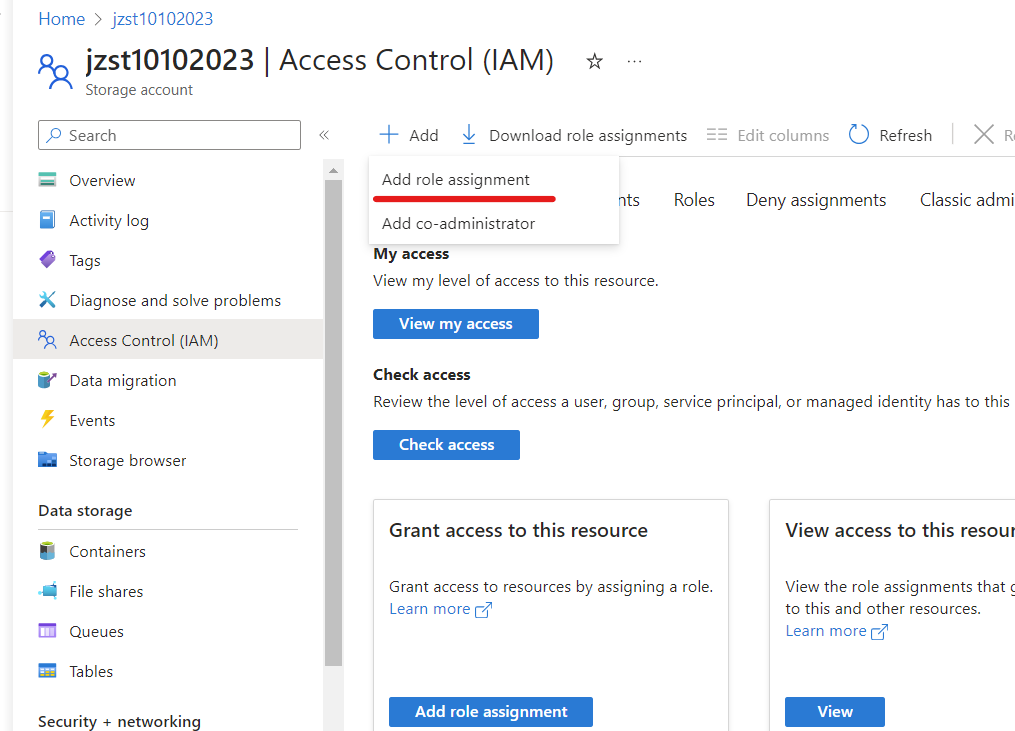
Add storage account roles
- NOTE: A storage account owner must add these roles
Storage Account ContributorandStorage Blob Data Contributorbefore creating the file system.- Blob integration prerequisites
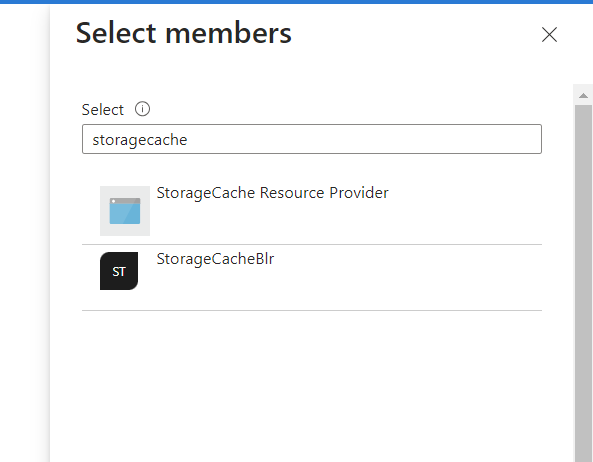
- Open your storage account, and select Access control (IAM) in the left navigation pane.
- Select Add > Add role assignment to open the Add role assignment page.
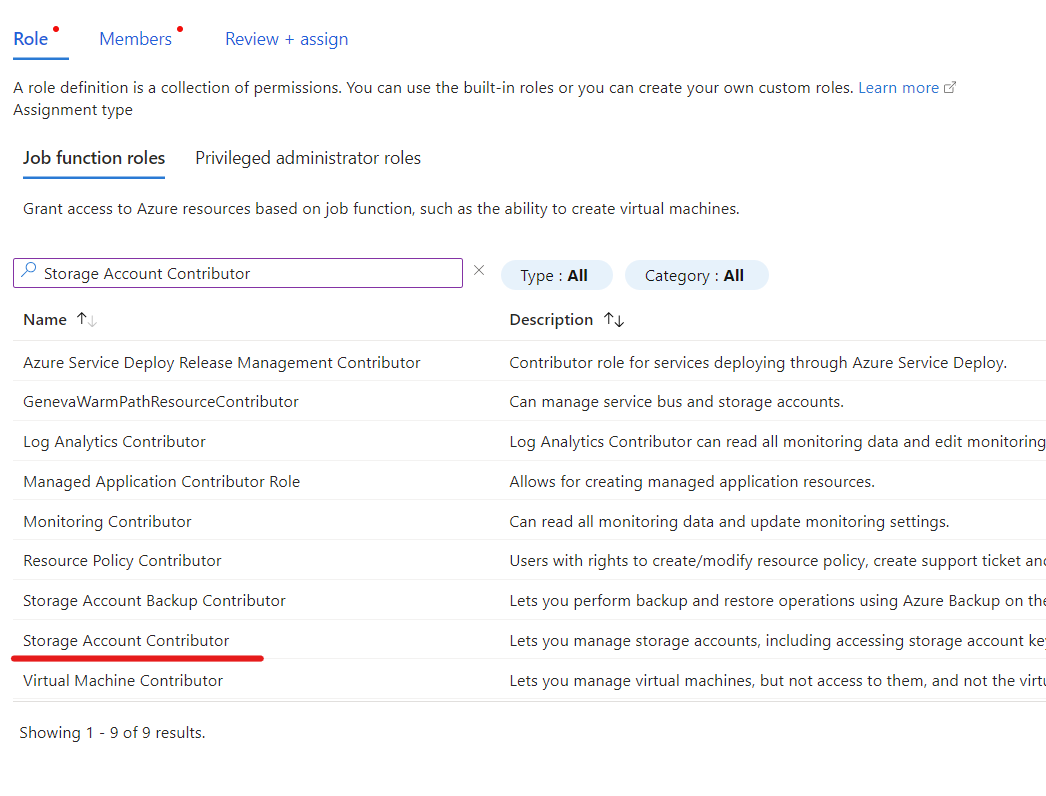
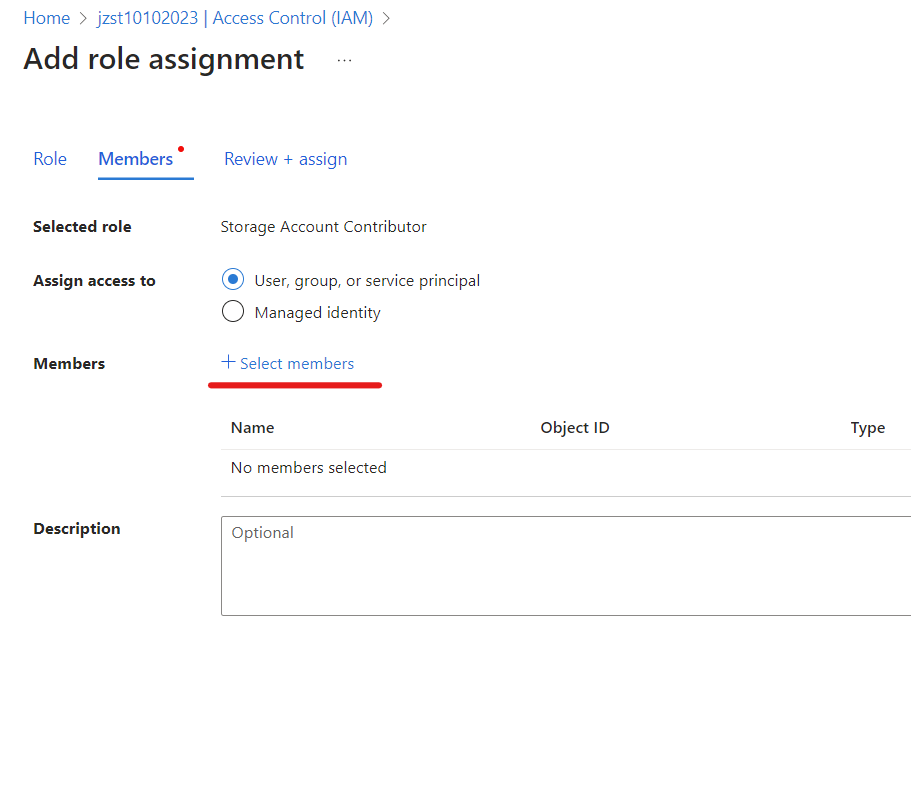
- Assign the role.
- Then add the HPC Cache Resource Provider (search for storagecache) to that role.
- Repeat steps 3 and 4 for to add each role.
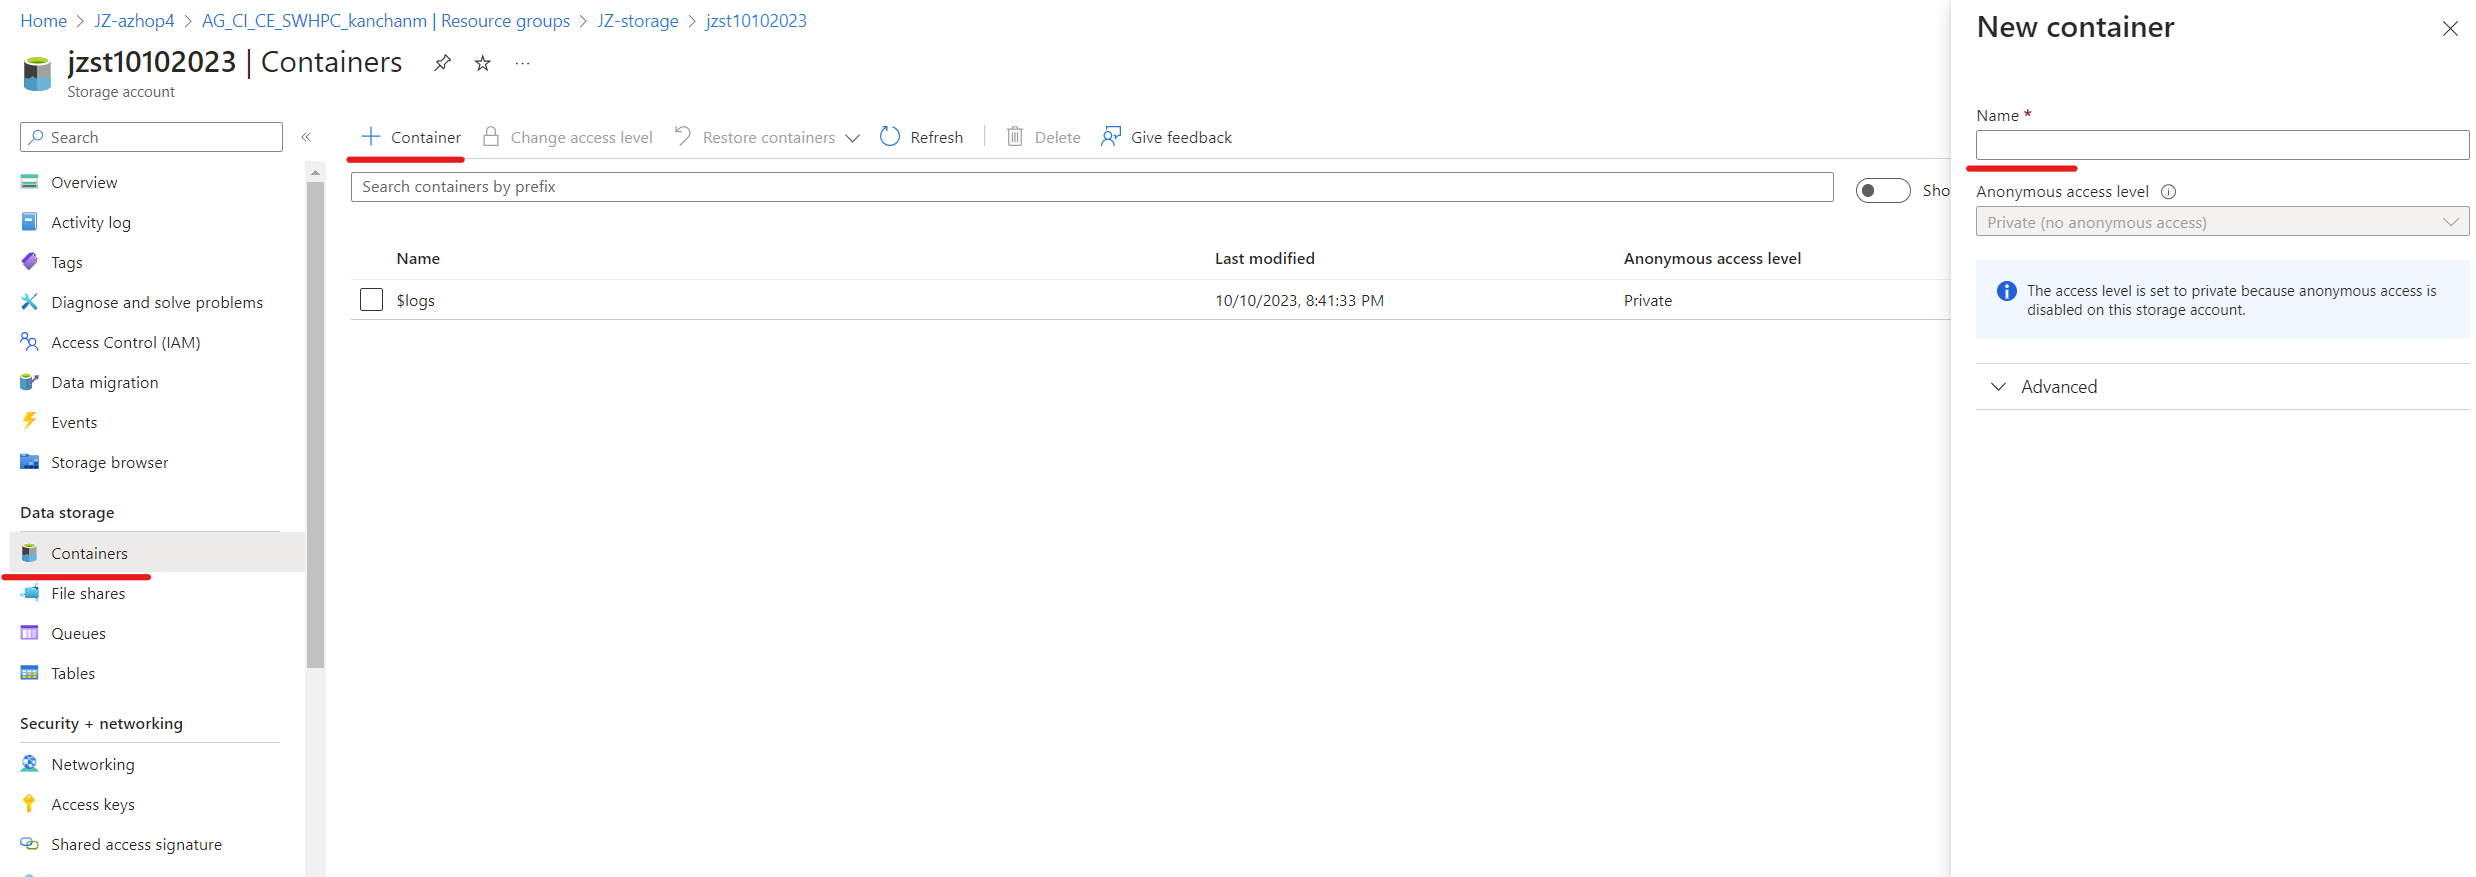
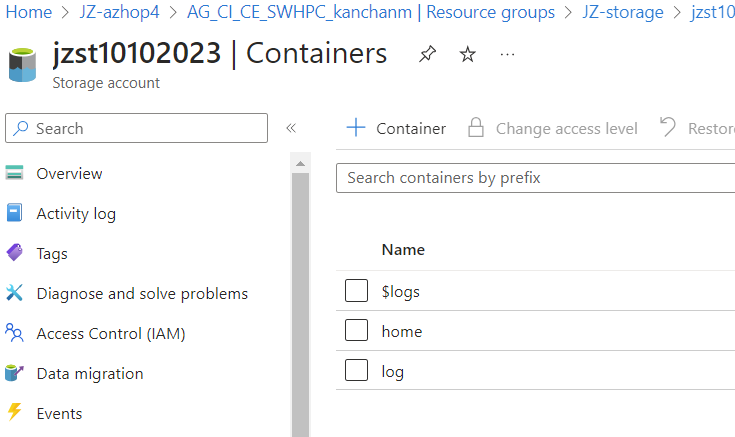
Add two containers in the storage account
- Create a container named
home - Create a container named
log
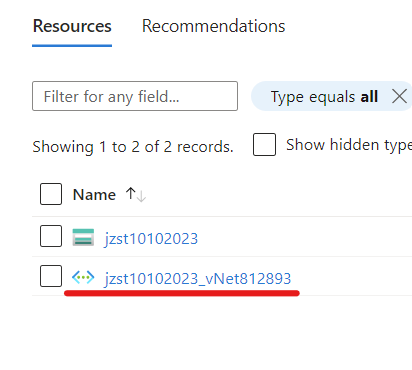
Create vnet peering
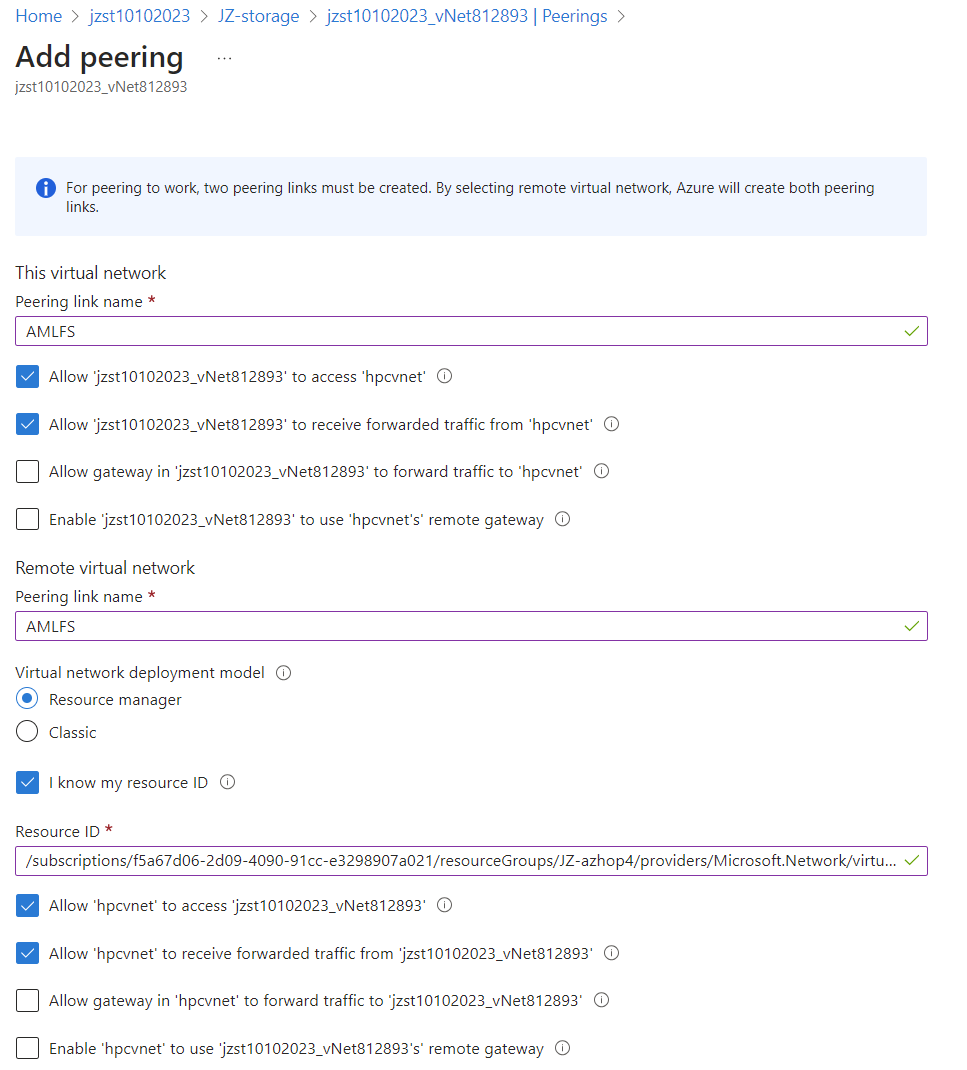
Navigate to the vnet in the storage account, click on Peering -> Add
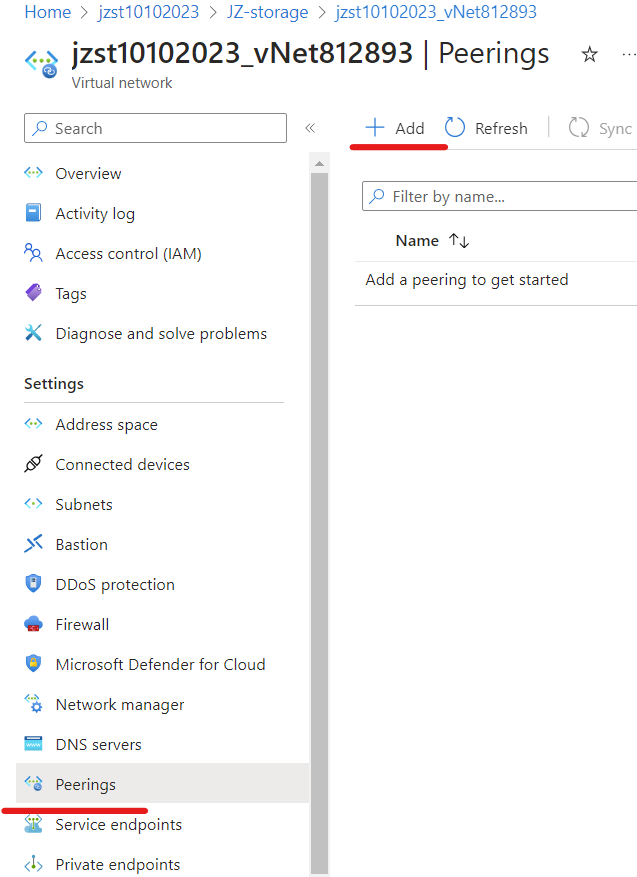
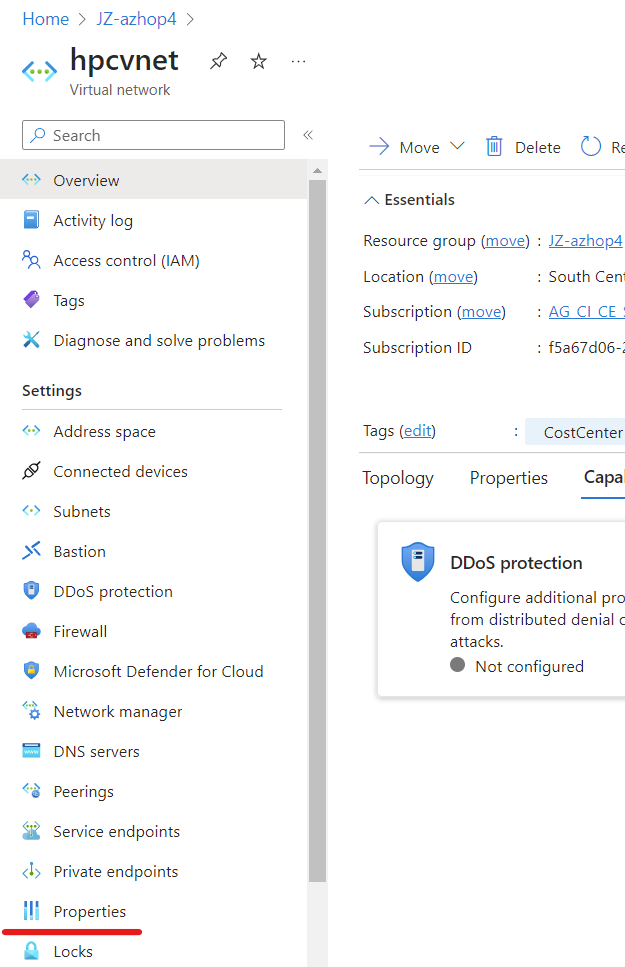
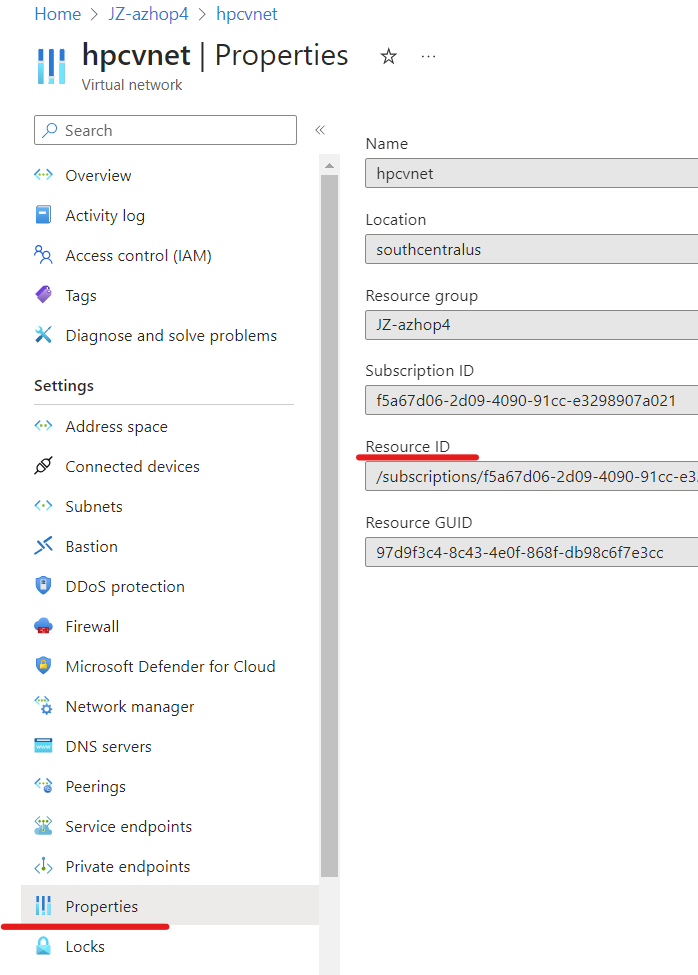
Fill out the filling as shown below. You can find the Resource ID from your AzHOP vnet page.
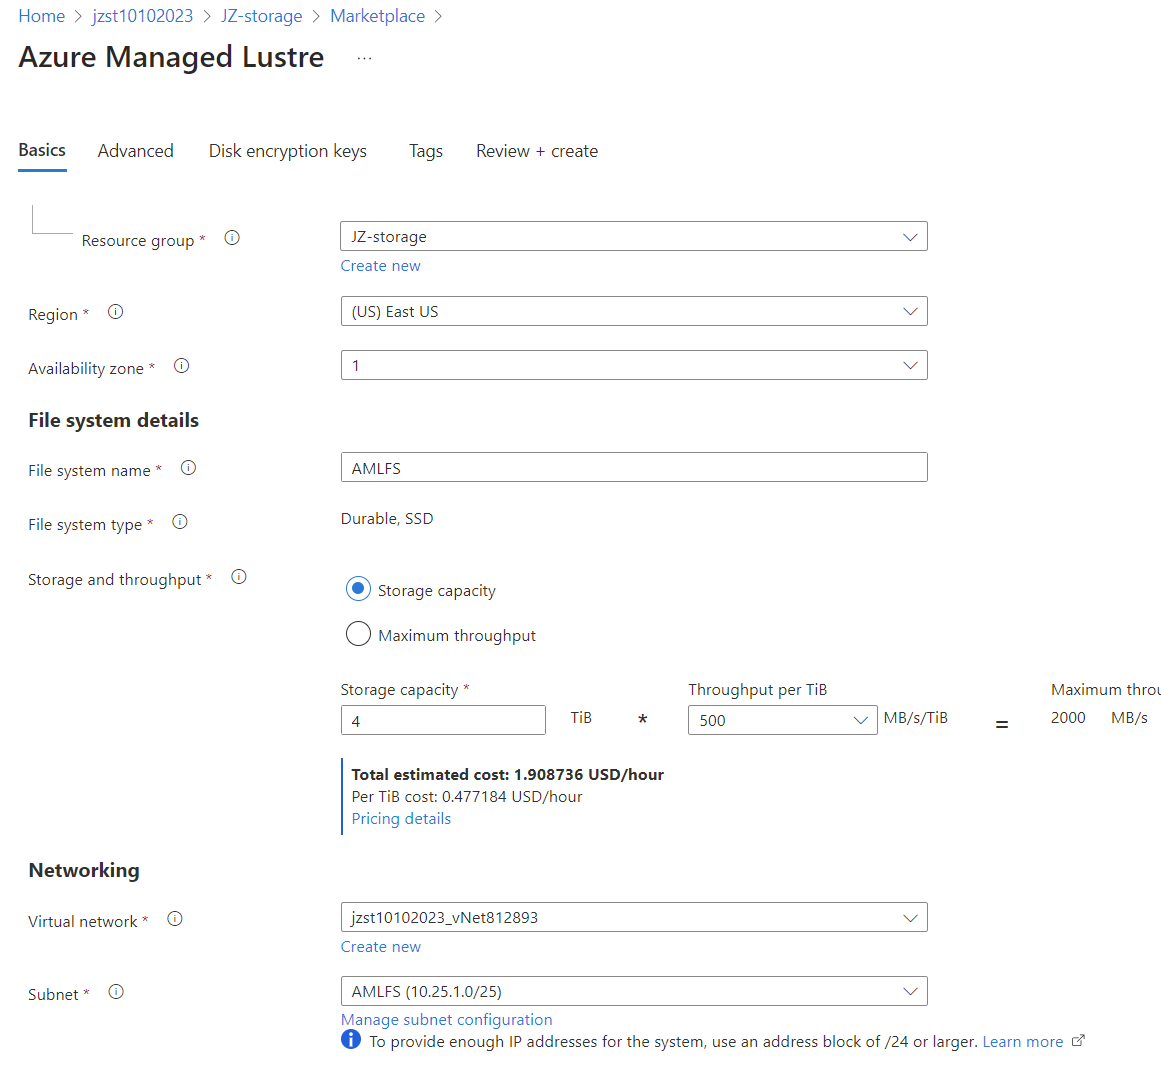
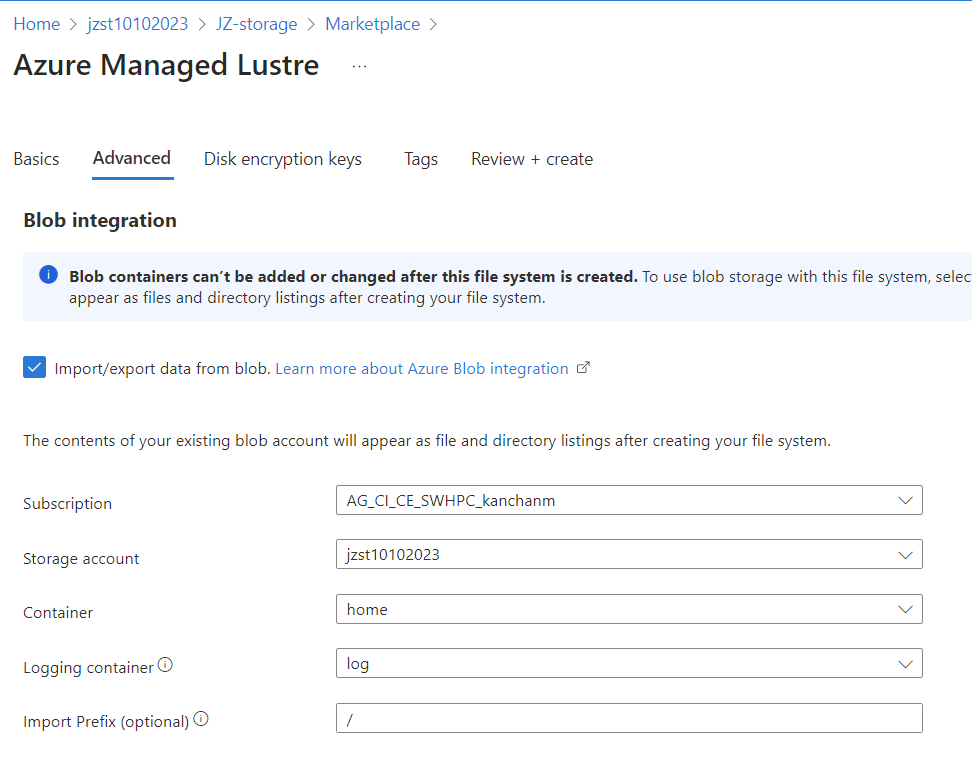
Create AMLFS
Fill out the Basics and Advanced tabs as below. Leave the rest as default.
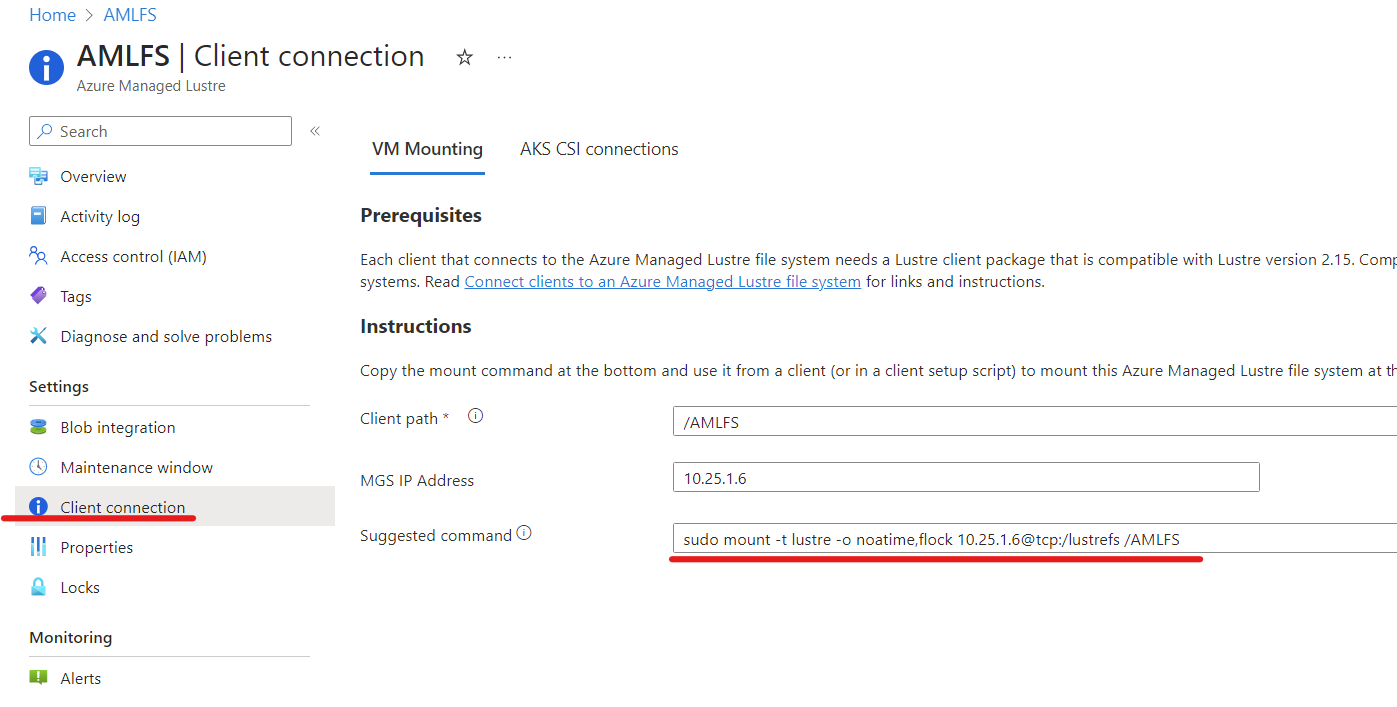
The AMLFS creation could take 10-15 minutes. After creation, you can find the mounting instructions like below:
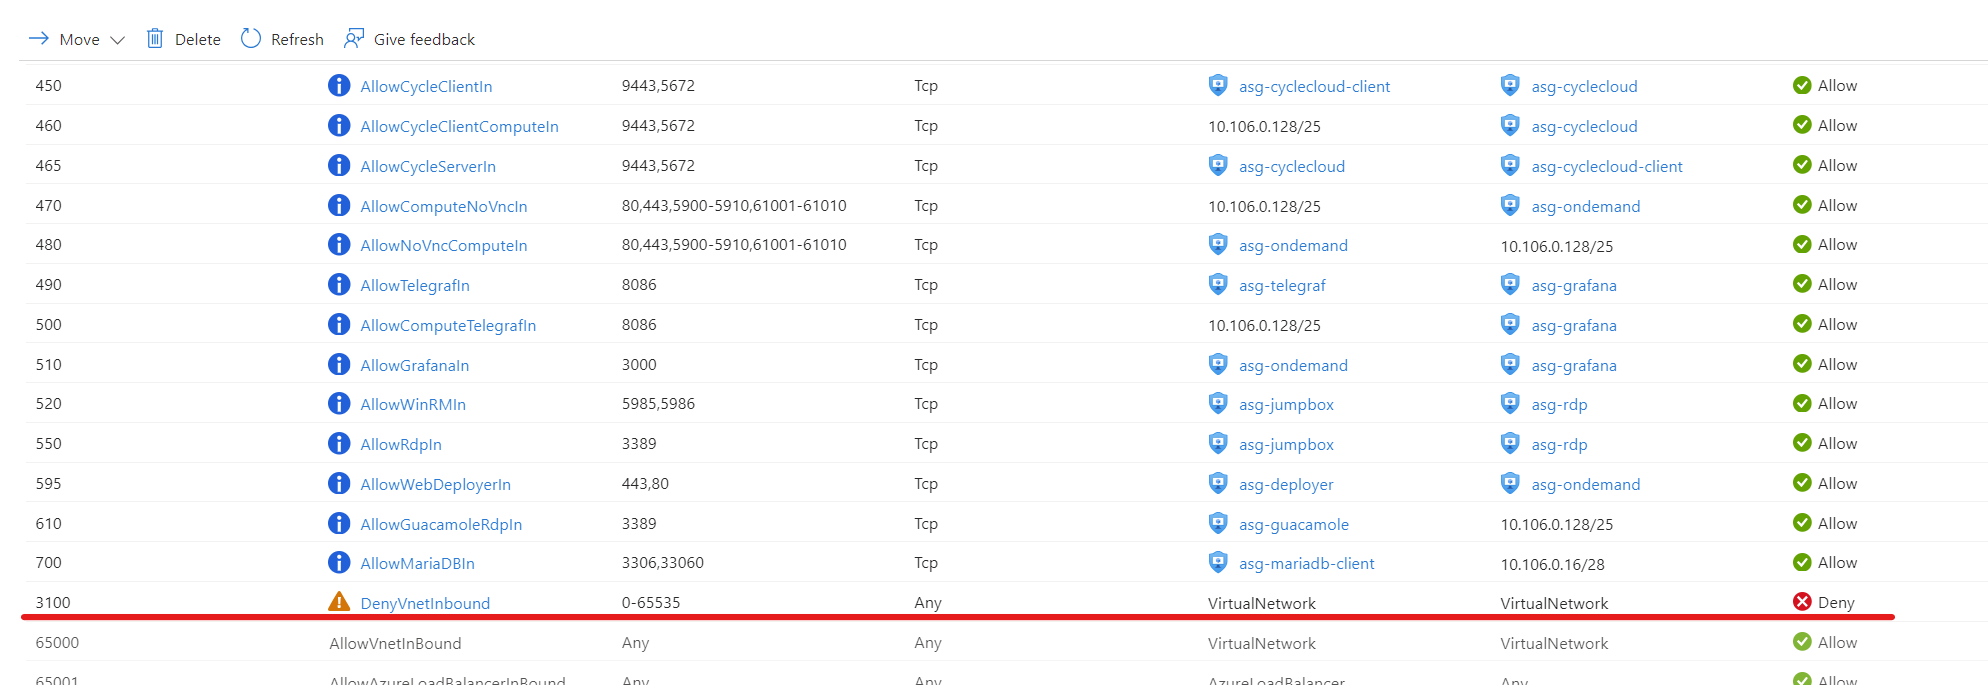
Update azhop network security group
In AzHOP, we need to change NSG 3100 rules from deny to allow for both inbound and outbound networks.
Mount AMLFS
Install AMLFS Client
- Lustre client software - Clients must have the appropriate Lustre client package installed. Pre-built client packages have been tested with Azure Managed Lustre. See Install client software for instructions and package download options. Client packages are available for several commonly-used Linux OS distributions. Client installation
```bash
CentOS 7
cat > repo.bash « EOL #!/bin/bash set -ex
rpm –import https://packages.microsoft.com/keys/microsoft.asc
DISTRIB_CODENAME=el7
REPO_PATH=/etc/yum.repos.d/amlfs.repo echo -e “[amlfs]” > ${REPO_PATH} echo -e “name=Azure Lustre Packages” » ${REPO_PATH} echo -e “baseurl=https://packages.microsoft.com/yumrepos/amlfs-${DISTRIB_CODENAME}” » ${REPO_PATH} echo -e “enabled=1” » ${REPO_PATH} echo -e “gpgcheck=1” » ${REPO_PATH} echo -e “gpgkey=https://packages.microsoft.com/keys/microsoft.asc” » ${REPO_PATH} EOL
sudo bash repo.bash
sudo yum install amlfs-lustre-client-2.15.129_gbae0abe-$(uname -r | sed -e “s/.$(uname -p)$//” | sed -re ‘s/[-]/./g’)-1
```bash
# Ubuntu 2004
cat > repo.bash << EOL
#!/bin/bash
set -ex

apt update && apt install -y ca-certificates curl apt-transport-https lsb-release gnupg
source /etc/lsb-release
echo "deb [arch=amd64] https://packages.microsoft.com/repos/amlfs-\${DISTRIB_CODENAME}/ \${DISTRIB_CODENAME} main" | tee /etc/apt/sources.list.d/amlfs.list
curl -sL https://packages.microsoft.com/keys/microsoft.asc | gpg --dearmor | tee /etc/apt/trusted.gpg.d/microsoft.gpg > /dev/null

apt update -y
EOL

sudo bash repo.bash

sudo apt install amlfs-lustre-client-2.15.1-29-gbae0abe=$(uname -r)
- Network access to the file system - Client machines need network connectivity to the subnet that hosts the Azure Managed Lustre file system. If the clients are in a different virtual network, you might need to use VNet peering.
- Mount - Clients must be able to use the POSIX mount command to connect to the file system.
- To achieve advertised performance
- Clients must reside in the same Availability Zone in which the cluster resides.
- Be sure to enable accelerated networking on all client VMs. If it’s not enabled, then fully enabling accelerated networking requires a stop/deallocate of each VM.
- Security type - When selecting the security type for the VM, choose the Standard Security Type. Choosing Trusted Launch or Confidential types will prevent the lustre module from being properly installed on the client.
Edit cluster-init
This is done on the deployer VM as root. After adding the file below, terminate the cluster and ./install.sh cccluster and ./install.sh scheduler.
root@deployer:/az-hop# pwd
/az-hop

root@deployer:/az-hop# cat > playbooks/roles/cyclecloud_cluster/projects/common/cluster-init/scripts/91-AMLFS.sh << EOL
#!/bin/bash

# Mount the lustre filesystem
mkdir /AMLFS
mount -t lustre -o noatime,flock 10.42.1.5@tcp:/lustrefs /AMLFS
chmod 777 /AMLFS

# Blob
# Download the Microsoft signing key
wget https://packages.microsoft.com/keys/microsoft.asc

# Convert the Microsoft signing key from armored ASCII format to binary format
gpg --dearmor microsoft.asc

# Create the directory for trusted keys if it does not already exist
mkdir -p /etc/apt/trusted.gpg.d/

# Copy the binary Microsoft signing key to the trusted keys directory
sudo cp microsoft.asc.gpg /etc/apt/trusted.gpg.d/

# Download and install the Microsoft repository configuration for Red Hat Enterprise Linux 7
sudo rpm -Uvh https://packages.microsoft.com/config/rhel/7/packages-microsoft-prod.rpm

# Install Blobfuse and Fuse using the Yum package manager
sudo yum install blobfuse fuse -y

# Open the configuration file 'fuse_connection.cfg' for editing using Vim
cat > fuse_connection.cfg <<EOL
accountName jzs310042023
accountKey 3IQ0aWKsdePJ+kaLNizGqAfomFgu7c2IEwZ2TLjxubxsUNfyu+XqBWfZqajJ41Sd7XFnNxtNc8VR+AStxn2Qhg==
containerName home
EOL

# Create a directory to serve as the mount point for the Blobfuse filesystem
mkdir /BLOB
# Mount the Azure Blob Storage container to the newly created directory
# Set temporary path, configuration file, and timeout options for Blobfuse
blobfuse /BLOB --tmp-path=/tmp/blobfusetmp_$$  --config-file=fuse_connection.cfg -o attr_timeout=240 -o entry_timeout=240 -o negative_timeout=120 -o allow_other
EOL
Check /AMLFS /BLOB in the nodes
After the above changess, on a compute node, you will be able to find AMLFS in /AMLFS directory, and blob storage in /BLOB directory. Note if you also needs those directories on the scheduler node, you can manually run the 91-AMLFS.sh script as root. You can move the files to /AMLFS for computation, and back to /BLOB for long term storage.
In conclusion, this blog post offers a comprehensive guide on integrating AMLFS with Blob storage intoAzHOP. The post covers a variety of crucial steps, from establishing a DataLake v2 supported storage account to configuring Network Security Group (NSG) settings. While the current approach utilizes Azure Portal, future efforts will aim to automate these steps using tools like Terraform and Ansible. The illustrative guide aims to facilitate both setup and troubleshooting, making it a valuable resource for anyone seeking to leverage the combined power of Azure’s HPC and AI capabilities for large-scale data workflows.
Leave a Comment